Kategori
Table of Contents
|
1. Start With the Venue, Not the Product 2. Privacy and Family Grouping 3. Hard Floor Stability Method 4. Protect Aisles and Exits 5. Match Height and Openings 6. Ventilation and Lighting 7. Flooring and Cleaning 8. Separate Units from Service Zones 9. What the Inquiry Should Include |
10. Common Indoor Selection Errors 11. Three Indoor Unit Types 12. Overhead Building Conditions 13. Material and Fire Documents 14. Verify With Sample and Layout 15. Indoor Installation Best Practices 16. Cleaning, Sanitization & Storage 17. Real-World Case Studies Frequently Asked Questions |
With over two decades of experience in institutional and emergency textiles, we've seen that the most costly mistake is choosing an indoor shelter the same way you choose an outdoor tent. Indoor selection has almost nothing to do with weather resistance — it's about how the unit works inside an existing building.
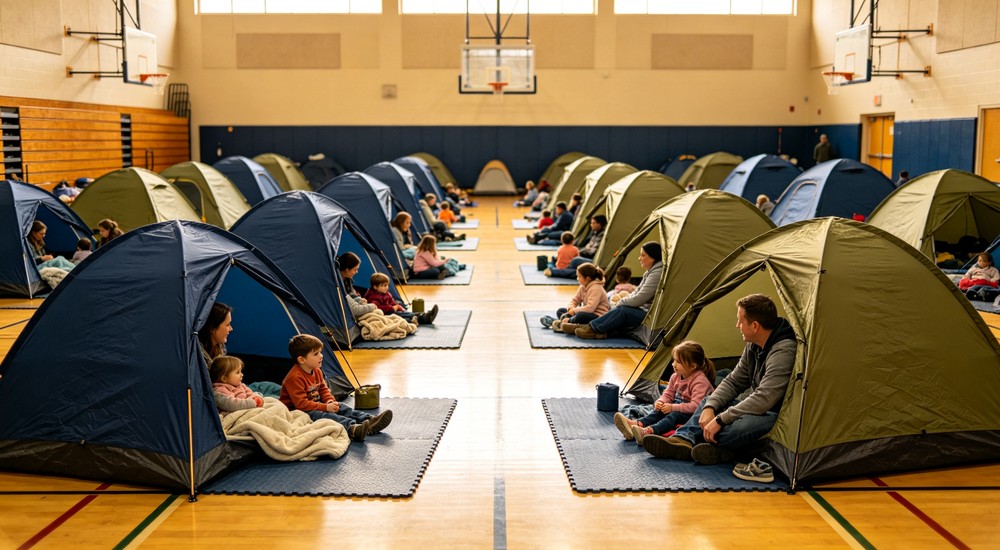
Before comparing products, identify which scenario matches your project. A temporary indoor shelter in a gymnasium needs a very different solution than a medical triage area in a school hall.
Every indoor emergency shelter tent decision must pass these four checks. Skip any one and you risk a product that looks right on paper but fails in the real venue.
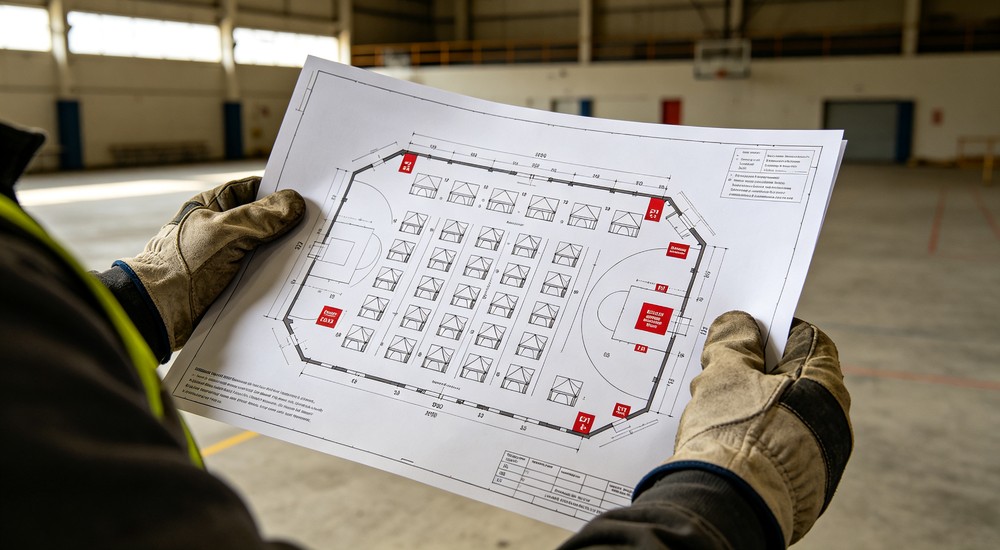
An indoor unit may provide family privacy, individual sleeping space, care, registration, staff support, or supply separation in a gymnasium, sports hall, school hall, exhibition center, conference center, or other public building. These tasks need different heights, openings, visual barriers, and internal components.
A lightweight divider may be enough for privacy. Compare a frame structure when beds, doors, equipment, or a defined independent space are needed. For example, an open-top privacy unit suits family separation when only visual screening is needed, while a frame-based indoor emergency shelter tent works better when beds, a defined door, or a more stable enclosed space matter. Ordinary accommodation units do not provide medical, isolation, or kitchen functions.
Define each unit's primary purpose before deciding whether one product can serve every zone. One indoor family shelter tent rarely handles family sleeping, registration, and care equally well.
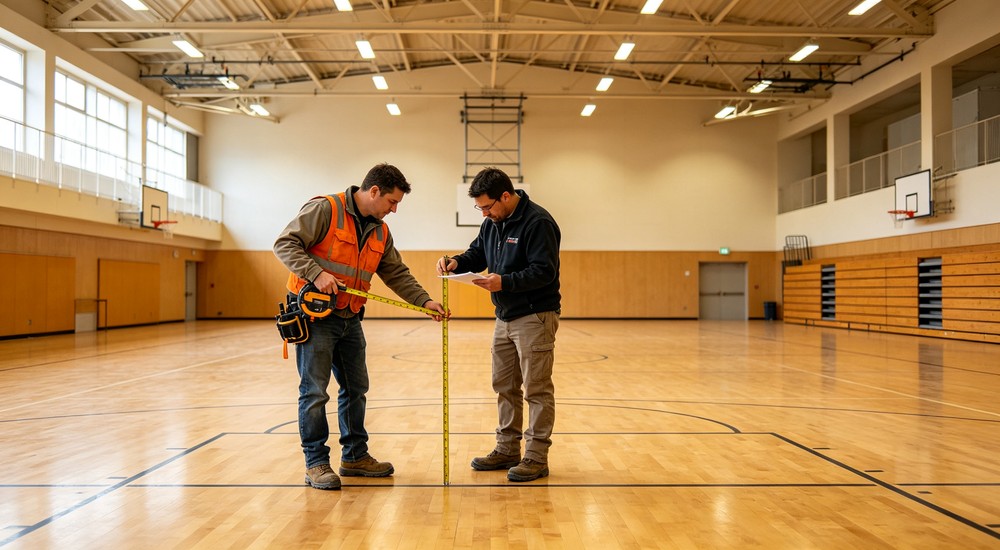
Key Takeaway: Define the primary task first: privacy, sleeping, care, registration, or storage. One product rarely serves every zone equally well.
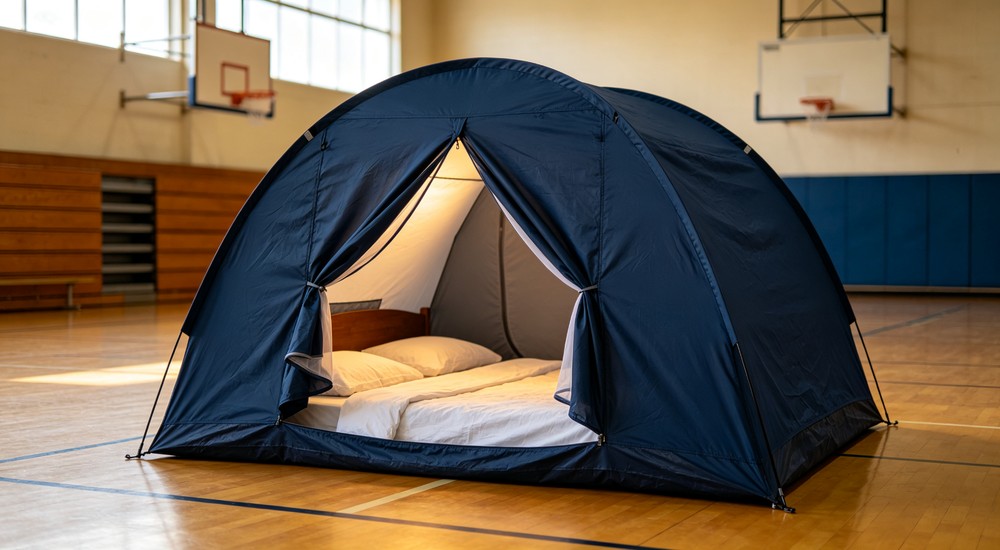
An indoor emergency shelter tent in an open hall can expose families, individuals, and people requiring care to noise and visual disturbance. Partition height, opening direction, closure, and occupant grouping all affect privacy.
State which families need separate units, who must remain near a care zone, and where staff visibility is required. Full closure is not always better because ventilation and management still matter.
The supplier should return partition, door, and layout directions and identify which components are included or optional.
Sketch family, individual, and assisted-user units before choosing partition height and entrances. This makes the structure serve the people. It prevents available tent dimensions from deciding which occupants must share one space.
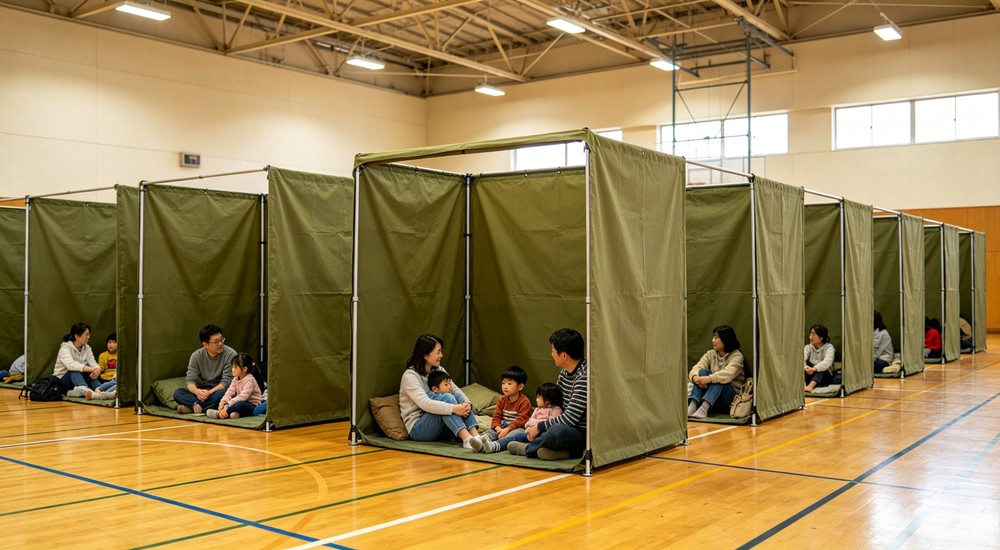
Key Takeaway: Match partition height and closure to the user group. Family areas may need more screening; staff zones need open visibility.
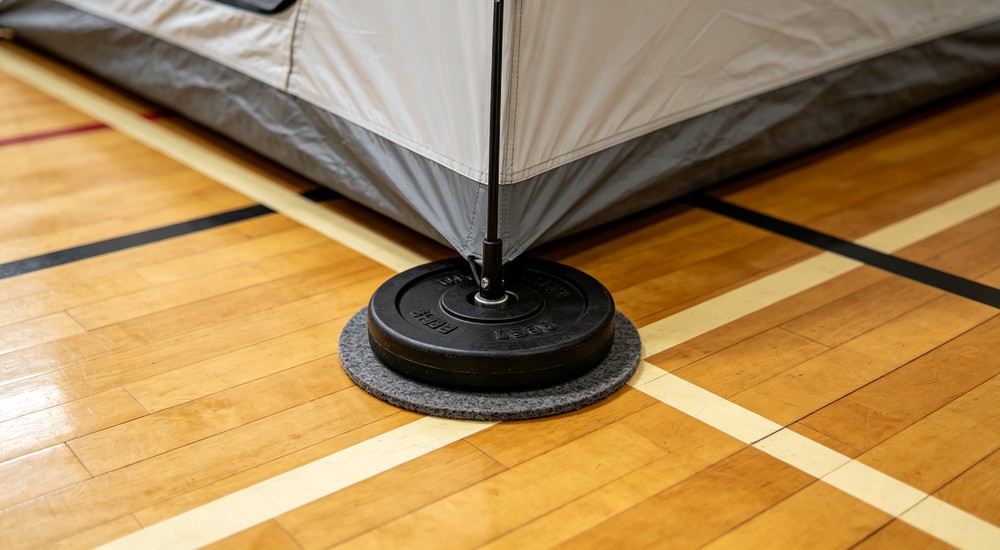
Sports flooring, concrete, and indoor finishes often cannot be drilled or used with ordinary stakes. Every frame tent for indoor use needs a confirmed stability solution before installation. A hard floor tent stability solution must be confirmed before installation. A structure requiring securing needs an alternative permitted by both its design and the building.
Indoor use does not automatically remove every stability need. Repeated access, contact, cables, and uneven surfaces can affect unit position. Ballast should not be improvised without checking the structure and floor limitations.
Provide the surface and venue restrictions. The supplier can then explain an applicable anchoring or stability method for the proposed unit.
An indoor stability method must also avoid floor damage, trip edges, and contact with temporary weights. The supplier should explain how each component works with the proposed frame. The project can then decide whether the venue permits that method.
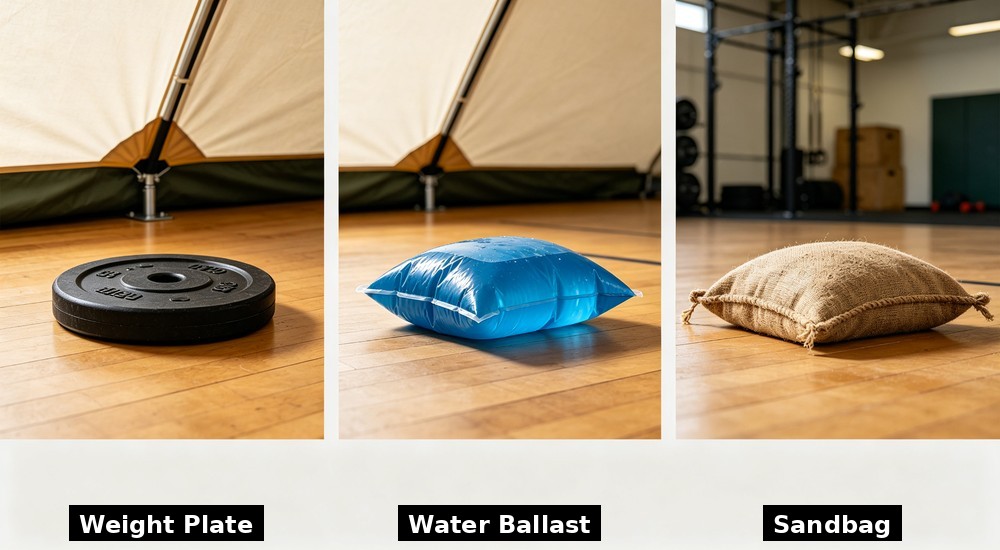
Key Takeaway: Never assume no securing is needed indoors. Confirm a floor-friendly stability method before choosing the unit.
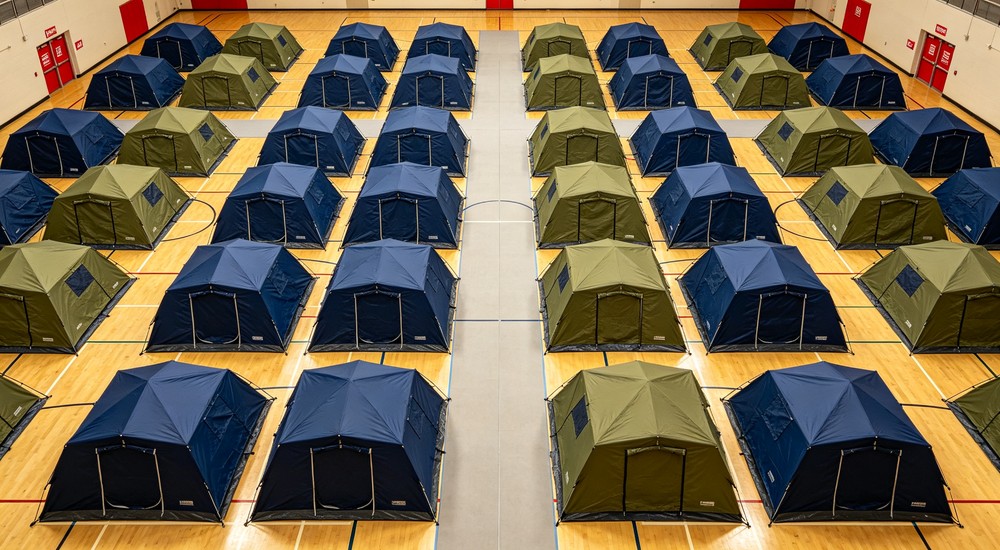
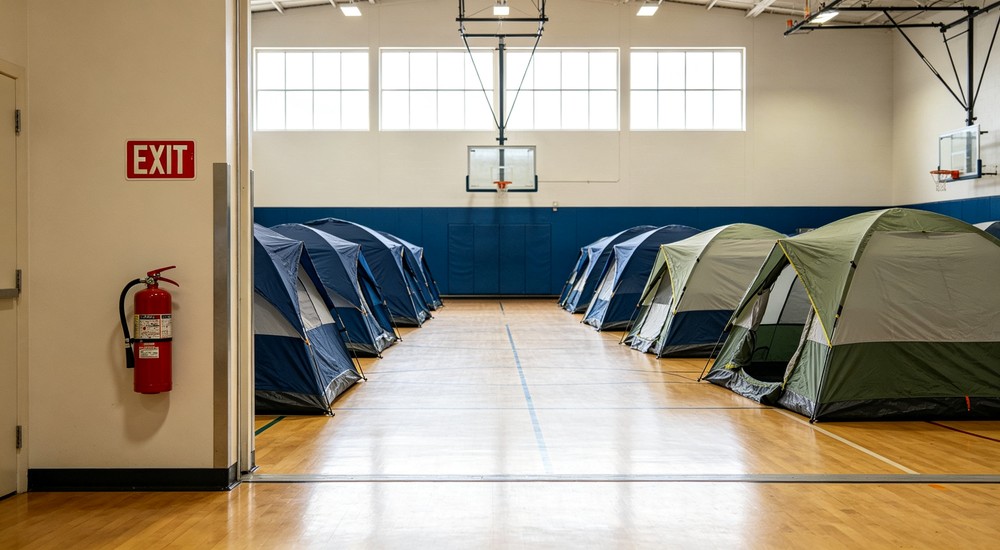
Tents, beds, luggage, and service areas must not block exits, primary routes, fire equipment, or staff access. The project and venue must define the applicable clearances; this article does not invent universal dimensions.
Mark every unavailable area on the building plan before arranging units. Door swings should not conflict with facing units or main aisles.
Do not reduce required circulation merely to fit the planned quantity. Reduce the units, change their direction, or use another space.
|
Decision Area |
Indoor Effect |
Buyer Confirms |
|
Privacy and grouping |
Defines units, partitions, and entrances |
Family, individual, care, and visibility needs |
|
Hard floor |
Ordinary stakes may be unusable |
Surface, drilling, and anchoring limits |
|
Aisles and exits |
Controls arrangement and door direction |
Venue areas that must remain clear |
|
Ventilation and lighting |
Enclosures change airflow and light |
Building systems and equipment positions |
|
Floor and cleaning |
Affects surface protection and maintenance |
Floor material and cleaning limits |
Show the complete outer footprint, opened doors, beds, and personal belongings on the layout. A rectangle using only nominal tent length and width can underestimate real space and place door movement inside an aisle.
Key Takeaway: Lock exits, aisles, and fire equipment on the plan first. Reduce unit count rather than reducing required circulation.
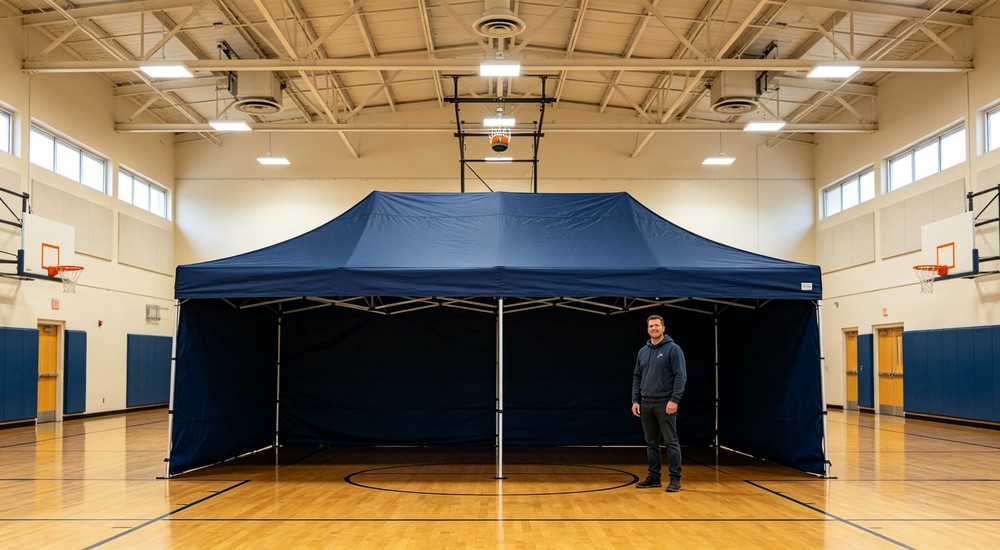
A sleeping privacy unit and a space for standing care or equipment do not need the same height or entrance. An indoor emergency shelter tent for medical care may need 2.2m+ eave height, while a sleeping-only unit can work at 1.8m. Thresholds, door width, and closure can affect people with limited mobility and equipment movement.
Provide the beds, users, equipment, and staff activities. The supplier should return usable internal height, doors, and support positions rather than exterior dimensions alone.
Too few openings can reduce usability, while unnecessary openings can reduce privacy or usable wall space.
Check clear building height, suspended lights, ducts, sprinklers, and other overhead services. A ridge height that fits below the ceiling does not prove that assembly or opened fabric remains clear of those systems.
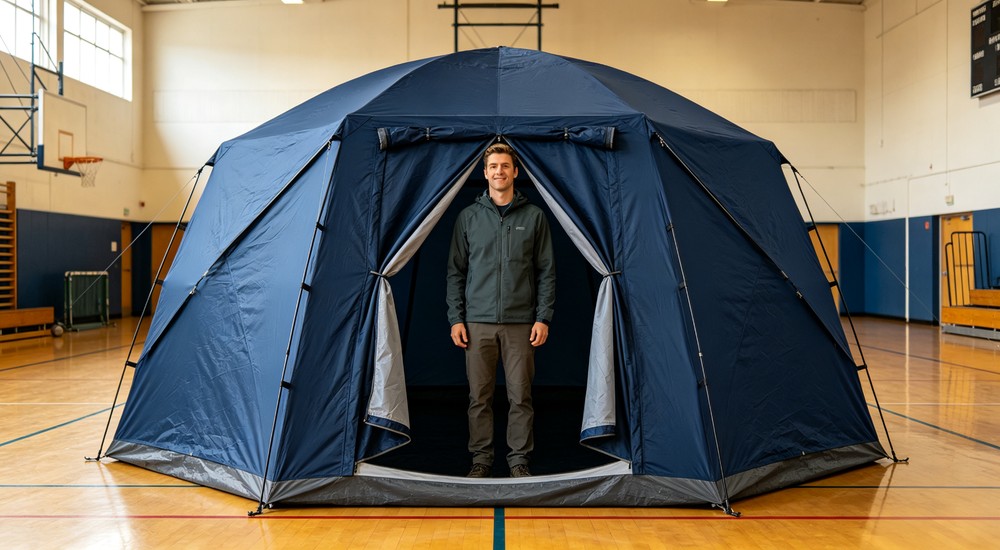
Key Takeaway: Compare internal usable height, not just exterior dimensions. Overhead building systems can reject a tent that fits on paper.
Partitions, covers, and dense layouts can change air movement even in an air-conditioned hall. Covers may also block building lighting.
State the building ventilation, air conditioning, daylight, and lighting positions. The supplier should explain doors, mesh panels, vents, and cover format.
Project wiring and lights must follow venue requirements. Cables should not cross aisles casually. Tent components should carry only the loads specified for the proposed configuration.
Observe a sample unit in the planned location. Close its privacy panels with a person inside, then check airflow, lighting, and staff visibility. This shows whether the selected partitions and roof treatment suit the building.
Key Takeaway: Building HVAC does not guarantee airflow inside a covered unit. Test a sample with panels closed before finalizing.
An indoor unit may not need a complete floor. Sleeping areas may still need separation from a cold surface, while the venue may require floor protection. Mats and floors also affect cleaning, trip edges, and equipment movement.
State the existing surface, bedding, cleaning frequency, and whether adhesives or fixing methods are allowed. The supplier should identify included status, edge treatment, and cleaning scope.
This article treats flooring as an indoor selection condition; the full floor comparison remains a separate topic.
Raised or curled floor edges can create a trip point near routes. Without a floor, buyers still need to define how bedding separates users from the existing surface. Compare both options with the actual cleaning method and sleeping system.
Related: Pair with emergency relief mattresses and institutional bedding sets for a complete sleeping solution.
Compare both floor options with the actual cleaning method and sleeping system. A venue requiring daily disinfection may prefer a wipe-clean groundsheet, while a short-term emergency shelter may use disposable mats.
Key Takeaway: Flooring is an indoor selection condition, not a default included item. Confirm edge treatment and cleaning method with the supplier.
Registration, charging, supplies, staff, care, and waste holding should not consume sleeping areas. A well-planned indoor emergency shelter tent layout separates these functions before calculating unit quantity. Mark public service zones before calculating how many privacy units fit.
One larger structure can centralize a function, while smaller units can divide families. Compare the building shape, columns, entrances, management, and night use.
Suppliers can propose combinations, but available product sizes should not determine the project's family grouping.
A hall can use smaller privacy units for family accommodation and keep a separate open area for registration and support. Forcing every task into one enclosed tent can reduce routes, airflow, and practical night use.
Key Takeaway: Separate sleeping units from service zones. Smaller privacy units for families plus an open shared area often works best.
Send the venue plan, floor restrictions, unavailable routes, users, beds, privacy, openings, ventilation, lighting, cleaning, quantity, and operating period. State whether drilling, ballast, or another securing method is permitted.
Request the structure, interior dimensions, openings, partitions, floor, stability method, and packaging. Ask which conditions require venue or project confirmation.
Flame, fire, accessibility, or medical claims must match the actual configuration and applicable documents. The product category alone proves none of them.
A comparable reply should show whether the offer is a privacy divider, covered accommodation unit, or frame tent. It should also explain stability, doors, partitions, included components, and which material documents cover the proposed configuration.
Related: Also compare outdoor frame tents for sites without building coverage, and emergency blankets for thermal protection.
Ready to start? Send your venue plan to info@yrftextile.com for a free indoor emergency shelter tent layout review. Typical reply within 24 hours.
Key Takeaway: Send the venue plan, floor limits, users, and beds in the first inquiry. Ask which conditions still require venue confirmation.
Assuming no securing is needed. Contact and repeated access are ignored. Confirm stability against the structure and floor.
Filling the hall before protecting aisles. Units may block exits. Lock unavailable areas first.
Seeking complete closure only. Airflow, lighting, and management visibility are ignored. Balance privacy with operating conditions.
Decision test: If exits, aisles, floor restrictions, and ventilation are absent from the layout, the indoor shelter plan is not complete.
A fourth error is treating outdoor weather resistance as proof of indoor suitability. Indoor selection depends more on flooring, clear height, exits, airflow, lighting, and user grouping. A strong outdoor product still needs these checks.
Buyers can finish the comparison with two practical options. Option A is an open-top privacy unit focused on screening, entrances, and beds. Option B is a frame-based unit with a door or cover, adding checks for hard-floor stability, clear height, airflow, and lighting.
Place both options on the same venue plan. The buyer can then see whether the additional frame improves real use. Choose Option A (open-top privacy unit) when the main need is visual screening, the building has good ventilation, and budget is tight. Choose Option B (frame-based unit) when defined doors, stronger separation, or standing care space is required, and the venue can accommodate the frame footprint. Compare indoor shelter tent size options carefully — choose the simpler structure when extra material and floor space create no needed privacy or independent function.
|
Decision Factor |
Outdoor Tent Selection |
Indoor Shelter Selection |
|
Primary concern |
Weather resistance, ground anchoring |
Hard floor, building systems, privacy |
|
Stability method |
Stakes, guy lines, ground anchors |
Weight plates, freestanding frame, floor-friendly ballast |
|
Space calculation |
Footprint plus guy line area |
Footprint plus door swing, aisles, exits |
|
Ventilation |
Natural airflow, windows, vents |
Building HVAC plus unit vents, mesh panels |
|
Height check |
Ridge height vs open sky |
Ridge height vs ceiling, beams, lights, ducts |
|
Floor protection |
Groundsheet, ground tarp |
Venue floor protection, cleaning method |
Key Takeaway: Avoid three errors: assuming no securing needed, filling halls before protecting aisles, and seeking complete closure only.
An indoor privacy divider suits visual screening, quick family grouping, and an open top in a gymnasium or school emergency shelter. A covered accommodation unit adds more screening when the building still provides suitable airflow and lighting.
A frame tent suits tasks needing regular interior space, doors, partitions, or a more stable independent unit. Hard-floor stability and overhead clearance still require a new indoor decision.
Medical, isolation, shower, kitchen, or equipment tasks need suitable specialist systems. A tent-like appearance does not make an ordinary accommodation unit suitable for those roles.
|
Feature |
Lightweight Privacy Divider |
Covered Accommodation Unit |
Frame Tent |
|
Best for |
Visual screening, quick grouping |
More privacy, moderate separation |
Defined space, doors, stable unit |
|
Roof cover |
Open top |
Partial or full cover |
Full roof and walls |
|
Stability need |
Low |
Medium |
High (hard floor solution required) |
|
Airflow & light |
Excellent (open top) |
Moderate (depends on cover) |
Needs vents and mesh panels |
|
Assembly speed |
Fast |
Medium |
Slower (frame components) |
Key Takeaway: Choose among three types: lightweight privacy divider, covered accommodation unit, or frame tent. Match the type to the task, not the appearance.
Mark clear height, beams, lights, ducts, sprinklers, and suspended equipment on a side view. Compare them with ridge height, eave height, and the movements needed during assembly.
The final standing height is not the only check. Raising, joining, or rotating frame components can temporarily require more space than the completed tent.
Choose a lower unit, move the position, or use an open-top privacy structure when installation would approach or obstruct building systems.
Key Takeaway: Mark beams, lights, ducts, and sprinklers on a side view. Assembly movement may need more clearance than the completed tent.
An indoor project may request documents for fabric, partitions, flooring, or other components. The buyer should state the exact requirement, and the supplier should explain which material and complete configuration each document covers.
A material name, a flame-related phrase, or a report for another tent does not prove that the current unit meets venue requirements. Building management still decides whether the documents and layout are acceptable.
Keep unsupported requirements unresolved until suitable information is available. Do not present them as confirmed performance.
Key Takeaway: Material and fire documents must match the exact configuration. A report for another tent or a general material name is not proof.
Place real units, beds, opened doors, routes, columns, and service zones on the plan. Then use one sample to examine floor stability, access, privacy, airflow, and lighting.
Ask ordinary users to enter, close privacy panels, move beside the bed, and leave. Staff can observe the route and required visibility at the same time.
The choice becomes clear when both the drawing and sample work, and the supplier returns the same structure and documents described in the quotation.
Key Takeaway: Verify with one sample and one layout. Both must work under real venue conditions before the choice is final.
Trusted by government procurement teams, military supply chains, and aid organizations across Asia, Africa, and the Middle East. Not every indoor shelter tent supplier understands the difference between outdoor weather resistance and indoor building compatibility. We focus on the details that matter for indoor deployments.
|
Indoor-Specific Design
No-drill stability systems, floor-protection-ready bases, and building-compatible heights. We don't just sell outdoor tents rebranded for indoor use.
|
Custom Layout Service
Send your venue floor plan and we'll provide a custom layout showing exact unit placement, aisle widths, and exit clearance — free for bulk inquiries.
|
|
Fire & Safety Documentation
Material fire ratings, cleaning protocols, and venue coordination checklists included with every bulk order. We help you pass venue management approval.
|
Mixed Configuration Orders
Order privacy dividers, frame units, and open-top shelters in one shipment. We help you match the right unit type to each zone in your venue.
|
Key Takeaway: The right indoor shelter supplier should understand venue constraints, not just product specifications. Ask for a custom layout and fire documentation before committing to any supplier.
Indoor tent installation differs fundamentally from outdoor tent assembly. No stakes, no guy lines, no ground preparation — instead, the installer must protect the venue floor, manage cables, avoid building systems, and coordinate with facility management before any component leaves the packaging.
Never drill or nail into the venue floor, walls, or ceiling. All stability must come from freestanding frames, weight plates, or venue-approved ballast. If a supplier's installation guide requires drilling, that product is not suitable for indoor use — request an alternative securing method before purchase.
Floor protection is mandatory. Lay a protective tarp or mat under every unit before assembly. This prevents scuffs on sports flooring, stains on carpet, and abrasion on concrete. Pay special attention to frame feet and weight plates — add felt pads or rubber coasters under every contact point.
Cable management prevents trip hazards. Any lighting, heating, or charging cables must run along walls or under cable ramps, never across walking aisles. Do not hang cables from tent frames unless the frame is rated for that load. Use only venue-approved power outlets and extension cords.
Coordinate with facility management before setup. Confirm: allowed setup hours, designated loading zones, fire marshal approval requirements, maximum occupancy per zone, and emergency exit locations. A unit that fits on paper may be rejected by building management because it blocks a sprinkler head or fire alarm pull station.
Assembly time and labor vary by type. A lightweight privacy divider for 2-3 people takes 5-10 minutes with one person. A frame-based indoor emergency shelter tent for 6-8 people takes 20-30 minutes with two people. Plan setup windows accordingly — a gymnasium housing 200 people may need 4-6 hours of assembly time with a team of 8-10 workers.
Key Takeaway: Indoor installation means no drilling, mandatory floor protection, cable management, and facility coordination. Confirm all venue requirements before any unit leaves the packaging.
Indoor tent cleaning and storage require different post-use handling than outdoor tents. Without rain, mud, and UV exposure, the main concerns are biological contamination, odors, and ensuring the unit returns to storage in a condition that protects both the product and the next venue's floor.
Sanitization is critical after shelter use. Wipe all fabric surfaces with a venue-approved disinfectant — typically a quaternary ammonium compound or diluted bleach solution (check fabric compatibility first). Pay special attention to high-touch areas: door zippers, handle straps, partition edges, and floor contact points. Allow all surfaces to dry completely before folding.
Odor management requires ventilation. Even short-term indoor use can trap body odors, food smells, and cleaning chemical fumes in enclosed fabric. After sanitization, hang units in a well-ventilated area for 24-48 hours before folding. For persistent odors, use a fabric-safe odor neutralizer — do not use perfumed sprays that can irritate sensitive users or trigger allergies.
Inspect for damage before storage. Check every seam, zipper, mesh panel, and frame component for tears, bent parts, or excessive wear. A unit used in a school gymnasium may show scuffs on the lower fabric from contact with bleachers or sports equipment. Repair minor damage with fabric tape or a sewing kit — do not store a damaged unit without marking it for repair.
Store in a clean, dry, indoor location. Fold units loosely — do not compress fabric for long periods, as this can create permanent creases and weaken waterproof coatings. Store on pallets or shelves, not directly on concrete floors, to prevent moisture wicking. Keep storage areas between 10-25°C (50-77°F) with relative humidity below 60%. Rodent and insect control is essential — a single rodent can destroy multiple units in storage.
Maintain a usage, cleaning, and indoor tent storage log. Record every deployment: venue name, dates, number of occupants, any damage noted, and the date of post-use cleaning. This log helps identify units that need replacement after heavy use and proves to facility managers that your inventory is properly maintained.
Key Takeaway: Indoor post-use handling focuses on sanitization, odor management, damage inspection, and controlled indoor storage. Maintain a usage log for every unit to track condition and cleaning history.
These scenarios illustrate how indoor emergency shelter tent selection works in practice. Each case highlights different venue constraints, user groups, and product choices.
A mid-sized city opens its high school gymnasium as a gym emergency shelter during a winter storm. The venue has a hardwood basketball court, bleachers on one side, and ceiling height of 8.5m (28ft). Building management prohibits any drilling or nailing into the floor or walls.
Solution: 40 lightweight privacy dividers (3×3m each) for family sleeping zones, arranged in rows with 1.2m (4ft) aisles between rows. Each divider houses a family of 4-6 people. Registration, charging stations, and supply distribution use the bleacher area and stage — no tents needed there. Freestanding stability with weight plates under each divider corner. Total setup time: 4 hours with 8 volunteers.
Why this works: The gymnasium already provides weather protection, lighting, and HVAC. Privacy dividers solve the main problem — family separation — without the cost and complexity of full frame tents. The open-top design preserves building ventilation and allows staff visibility from the running track above.
A rural school repurposes its main hall using an indoor medical triage tent setup as a temporary observation area during a public health surge. The hall has tile flooring, 4m (13ft) ceiling, and limited natural light. The school requires all units to be wipe-clean and fire-retardant.
Solution: 8 frame-based indoor emergency shelter tents (4×4m each) with full roofs and doors, arranged in two rows with a 2m (6.5ft) central aisle. Each tent serves as a private observation room for 2-3 patients. PVC-coated polyester fabric allows daily disinfection. Hard-floor stability uses water-filled weight bladders under each frame foot — no drilling required. Temporary LED strip lighting inside each tent, powered by wall outlets with cable ramps across the aisle.
Why this works: Medical triage requires more privacy and separation than family sleeping. The full-frame tents provide enclosed spaces with doors, allowing patient confidentiality and infection control. The wipe-clean PVC fabric meets the school's hygiene requirements. Water bladders protect the tile floor while providing enough stability for door operation.
A suburban community center opens a community center shelter as a low-barrier option during extreme heat. The building has multiple rooms: a large multipurpose room (carpeted), a gymnasium (wood floor), and several classrooms (tile). Shelter guests include individuals, couples, and small families with varying privacy needs.
Solution: Mixed structure approach — 15 open-top privacy dividers in the gymnasium for individuals and couples who prefer open visibility, 6 covered accommodation units in the multipurpose room for families needing more screening, and 3 frame tents in classrooms for guests with medical needs or requiring quiet. Each zone has its own aisle width and stability method appropriate for the floor type. Carpeted areas use non-slip rubber pads under weight plates; wood floors use felt pads; tile uses water bladders.
Why this works: A single shelter type cannot serve all user groups in a mixed facility. Matching the unit type to the room and user group maximizes comfort and safety while respecting each floor's protection requirements. The community center staff can adjust the mix as guest needs change during the shelter's operation.
Key Takeaway: Indoor shelter selection depends on venue type, user group, and floor constraints. Gymnasiums work well with open-top dividers; medical triage needs full-frame enclosed units; mixed facilities benefit from a combination of types matched to each room.
Not without a new review. The proposed model must fit the hard floor, permitted stability method, entrances, aisles, ventilation, lighting, and venue management rules. Ordinary outdoor stakes may be unusable, while guy lines or long components may interfere with circulation.
An outdoor frame tent can remain a candidate when its configuration suits the indoor task. Do not assume that outdoor use evidence automatically proves indoor installation, fire compliance, or protection of the venue floor. Keep the tested indoor arrangement linked to the proposed configuration for comparison.
Not necessarily. Wind exposure may be reduced indoors, but repeated access, accidental contact, cables, uneven floors, and the unit's own design can still create stability needs. The correct method must fit the structure and the venue surface.
A freestanding or alternative securing approach is suitable only when the supplier confirms it for the configuration and the venue accepts it. Do not omit required components or add unverified ballast merely because ordinary ground stakes cannot be used. Ask the supplier to show the permitted method on the sample unit.
No. The required enclosure depends on family privacy, individual protection, observation, ventilation, lighting, and management. A fully covered unit may provide more visual separation but can change airflow and block building light.
A partial-height or open-top unit may suit some halls when the project accepts the privacy level. Do not select closure from appearance alone. Show the user groups and building conditions to the supplier and compare the actual partition and opening arrangements.
Test the selected closure with a person using the actual sleeping place.
It depends on the existing floor, sleeping products, thermal comfort, cleaning, moisture, equipment, trip edges, and venue protection requirements. A complete floor, groundsheet, mat, or no added layer may be appropriate in different projects. Ask whether the proposed item is included and how its edges are managed.
Indoor use does not remove every ground-separation need. Check dimensions and connections before adding a floor designed for another tent. Check the edge treatment on the proposed sample before choosing the floor option.
No. Building exits, primary aisles, columns, fire equipment, registration, care, storage, charging, waste handling, opening clearance, and structural footprints reduce the area available for units. Mark these zones before arranging the accommodation.
Hall area is useful for early screening, but the final quantity must come from an actual layout. Do not fill every remaining square area if entrances, staff access, ventilation, or the venue's required clearances become unusable. Use the venue plan, not a simple area division, for the final count.
Not always. A roof can improve visual privacy but may reduce light and airflow or interfere with building systems. Open-top or partially covered units may suit some projects when the venue, user group, and privacy requirement allow them.
Fully covered units can be assessed when the task needs more separation and ventilation remains adequate. Do not infer fire performance, airflow, or indoor suitability from the presence or absence of a roof; confirm the complete configuration and venue requirements. Compare both roof options in the planned lighting and ventilation position.
No. Fire and evacuation requirements depend on the venue, jurisdiction, project, material, complete product configuration, layout, spacing, exits, and supporting documents. A general product name or material description is not proof of compliance.
State the applicable requirement and ask the supplier which document covers the quoted configuration. The venue or responsible project team must decide whether it meets the applicable requirement. Do not claim that all frame tents, privacy units, or temporary shelters share one flame or fire status.
Keep the applicable material document linked to the quoted configuration.
Send the venue plan, floor type, drilling or anchoring restrictions, unavailable routes, intended users, beds, privacy groups, openings, ventilation, lighting, cleaning, quantity, and operating period. Mark exits, columns, fire equipment, and service zones. The supplier should return a structure and layout direction, internal dimensions, included components, and unresolved venue conditions.
A simple model request without this information is not enough to determine whether the unit can be installed and operated safely in the building. Include one marked layout so the supplier can return a comparable option.
A privacy divider mainly provides visual screening and occupant grouping. A frame tent creates a more defined space with possible doors, partitions, or a cover. Compare beds, standing activity, stability, ventilation, lighting, and overhead clearance.
A lightweight divider suits projects needing only screening and an open top.
A complete frame is unsuitable when its extra structure adds no buyer benefit. A divider is unsuitable when the task genuinely needs defined entrances, stronger separation, or supported internal components. Record the chosen structure and openings before selecting the final option.
Setup time depends on unit type and team size. A lightweight privacy divider for 2-3 people takes one person 5-10 minutes. A frame-based unit for 6-8 people takes two people 20-30 minutes.
For a 200-person gymnasium deployment, plan for 8-10 people and 4-6 hours of assembly. Always request a setup demonstration from the supplier before bulk ordering, and factor in venue coordination time for floor protection, cable management, and fire clearance checks.
Trusted by government procurement teams, military supply chains, and aid organizations across Asia, Africa, and the Middle East
 |

|
Sebelumnya :
Frame Tent with Floor vs No Floor: How to ChooseSeterusnya :
What Size Frame Tent Fits a Temporary Shelter?Pautan Mesra :
hak cipta © Custom Disaster - Relief Bedding: Tents, Sleeping Bags, Blankets Hak cipta terpelihara
pasukan profesional untuk perkhidmatan !